Categories and tags help web site visitors quickly and easily sort content to find their topic of interest.
Categories typically include broad topics while tags are used for more specific topics, but they might also cut across multiple categories.
Usage, Best Practice, and Accessibility
Example
Tags
Scroll down for Drupal Lite instructions.
Add tags/categories to your content type
Step 1: Create tags/categories vocabulary
- Go to the taxonomy page (Admin > Structure > Taxonomy) and add click “Add vocabulary” button.
- Fill out the name and description for your vocabulary and click "Save."
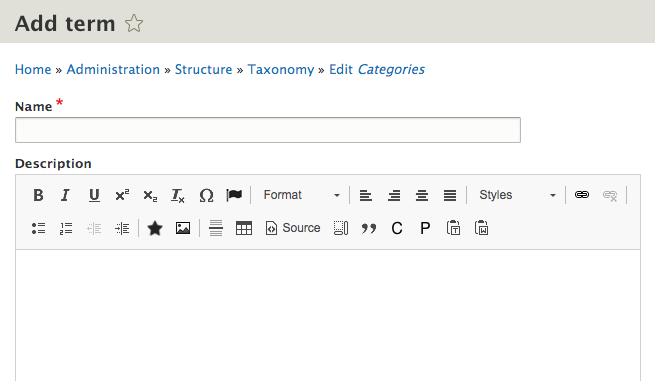
- On the next screen, click the “Add term” button to add taxonomy (category or tag) terms to your vocabulary.
- Fill out the name and description for your taxonomy term and click "Save."
- Repeat this step for each taxonomy term.
Step 2: Reference tags/categories vocabulary in your content type
- Go to your content type (Structure > Content types > ”name of your content type”).
- On the Manage Fields tab click the “Add field” button.
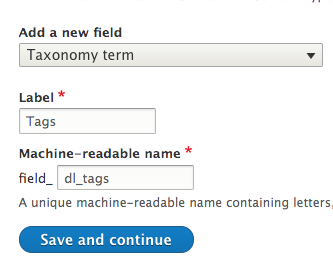
- On the next screen add a new field type, Taxonomy term, in the label field write Tags or Categories, and click the “Edit” link next to the label to edit the machine name. Write “dl_tags” in the machine name field (if you’re creating tags) or write “dl_categories” in the machine name field (if you’re creating categories) and click the “Save and continue” button.
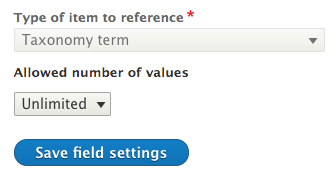
- On the next screen, change the “Allowed number of values” to “Unlimited” and click the “Save field settings” button.
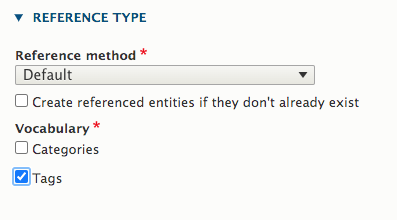
- Under the reference type, click “Default” as a reference method and select “Tags” (if you’re creating tags) or select “Categories” (if you’re creating categories) from the list of vocabularies.
- Scroll down and click “Save settings”.
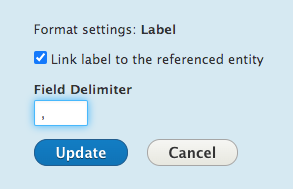
- Go to the “Manage display” tab in your content type and change label of your categories field to “Inline”. Also on this page, click the settings icon
in the right column of the categories field and add a comma in the field delimiter box and click “Update” button.
- Tags/Categories component should be available in your content type.
Add tags/categories to your listing page
- Click the “Layout” tab on your listing page. If layout builder is not enabled in your content type, enable it under the “Manage display” tab of your content type.
- Click the “Add section” button and choose the layout you want to use from the list of layout builder layouts.
- Click “Add block.”
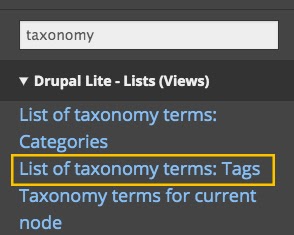
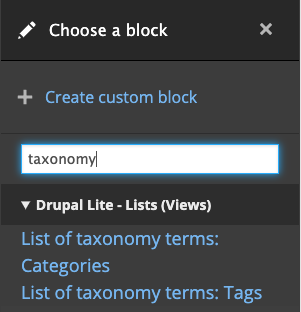
- Write “Taxonomy” in the block search bar.
- Click on “List of taxonomy terms: Tags” link if you’re creating tags. Click on “List of taxonomy terms: Categories” link if you’re creating categories.
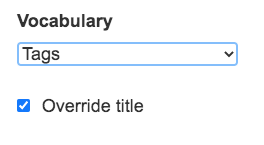
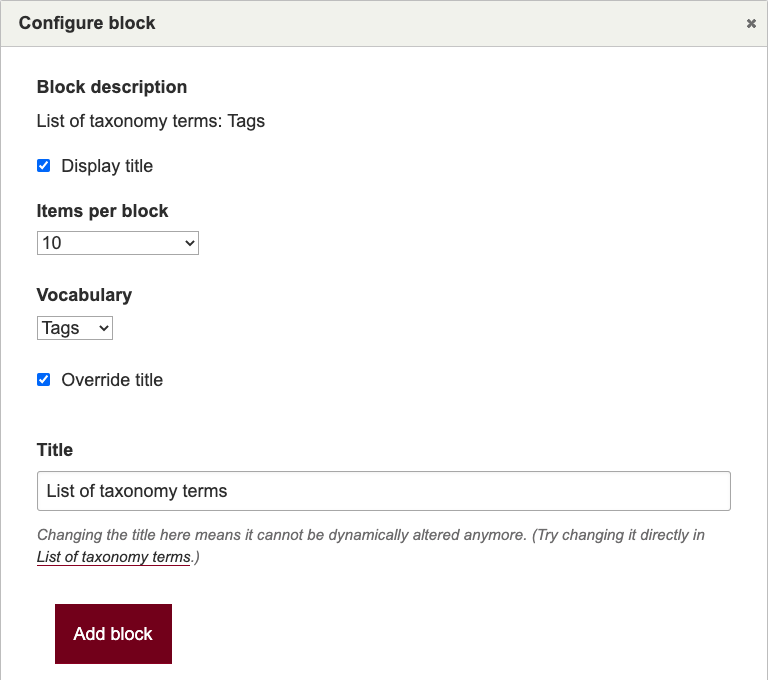
- On the next screen, select “Tags” if you’re creating tags or “Categories” if you’re creating categories under the Vocabulary dropdown list.
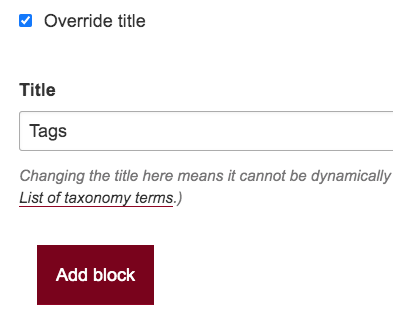
- Check the “Override title” check box and write “Tags” or “Categories” on the title text field. Note: You can give whatever title you want for your Tags or Categories.
- Click “Add block” button.
- The tags/categories component should be available in your listing page.
Drupal Lite
Tags
Step 1: Create tags
- Go to the taxonomy page (admin/structure/taxonomy).
- Click on “List terms” in the dropdown next to Tags.
- On the next screen, click the “Add term” button to add tag terms to your vocabulary.
- Fill out the name and description for your tag term and click save.
Step 2: Add tags to your listing page
- Click the “Layout” tab on your listing page. If the layout builder is not enabled in your content type, enable it under the “Manage display” tab of your content type.
- Click “Add block” where you would like to add your tags to your layout.
- Write “taxonomy” on the block search bar.
- Click on “List of taxonomy terms: Tags.”
- Click on “Display title” to include a title above your tags (titles are recommended for usability and accessibility).
- Specify the number of tags you want to display on your page.
- Choose “Tags” in the Vocabulary dropdown.
- Check “Override” title to add your own title.
- Click “Add block.”
- Click “Add block” button
- Your are now ready to add tags to your individual pages.
Categories
Contact help@umn.edu to have the Lightning UMN Drupal Lite Categories module enabled.
Once categories have been enabled, follow all the same steps to set them as you did with tags, making sure to replace "tags" with "categories" as you go through the instructions.
- Limit the number of categories and tags used—too many may be confusing and too few may not be helpful.
- Each category and tag should be unique.
- Categories and tags should be short—1 to 3 words.
- Choose a case style and keep it consistent.
- Use plurals on tags when it makes sense to aid visitors searching for the singular version of a word.
- You don’t have to use categories AND tags. Do what’s best for you and your audience. If you’re not sure, start with categories only and expand into tags later on, when the need becomes apparent.
- Display categories and tags in alphabetical order.
- When applicable, assign more than one tag to a piece of content.
- If you work in a team, make sure you have a very precise and unambiguous understanding of how tags are given.
- Keyboard navigable—visitors are able to tab through tags and categories.
- Headings allow you to properly identify categories and tags on your page (e.g., “Categories” or “Tags”).
- Tags and categories should be in alphabetical order to boost scannability.
- Meets WCAG 2.1 AAA color contrast requirements.


