Font Awesome icons are a font collection of scalable, vector-based icons that can be customized to your site's design. There are thousands to choose from, and you can customize the size, color, and just about any other attribute. They provide visual interest to your content and make it easier to scan.
Usage, Best Practice, and Accessibility
Example
Folwell has been built to include the free icons from the Font Awesome 5.0 library
Recommended Usage
Font Awesome is a library of free and paid icons that can be implemented on the site. The University is using the free Font Awesome 5.0 library, so the paid icons will not work.
Recommended usage of the icons is to define them in CSS. Work with your local developer to implement this.
There are four important parts to include when referencing any individual icon using CSS pseudo-elements:
- Set the pseudo-element to match either the ::before or ::after
- Set the font-family to Font Awesome 5 Free
- Set the font-weight: 900 (Solid), 400 (Regular or Brands), 300 (Light)
- Set the content to the unicode value of the icon you want
Example
.folder::before {
font-family: "Font Awesome 5 Free";
font-weight: 900;
content: "\f07c";
}
CKEditor Alternative
Please note: Including Font Awesome in the CKEditor is another alternative, but it must be set up carefully. Take care not to disable any filters or accidentally rearrange or enable/disable any filters. Improper configuration can cause security issues and may make some features not work. Also, due to a current bug without a patch, there is the limitation of only adding one Font Awesome icon to a page using the CKEditor.
- Navigate to Configurations > Content authoring > Text formats and editor.
- Select Folwell CKEditor from the list and click “configure” button.
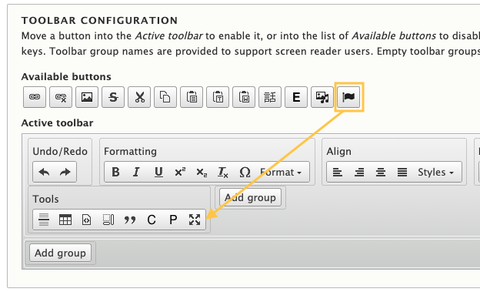
- The Font Awesome Icon plugin is represented by the Font Awesome flag. Simply drag it to the active toolbar (into the Tools section of the bar, for example).
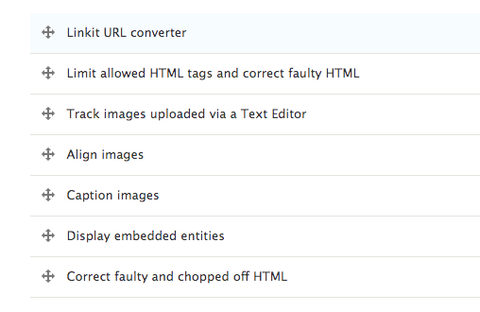
- Scroll down and make sure your “Filter processing order” section has the sections in the following order.
- Navigate to Configuration > Content Authoring > Font Awesome settings. Select "<span>" from the "Font Awesome Tag" dropdown and click the "Save configuration" button at the bottom of the page.
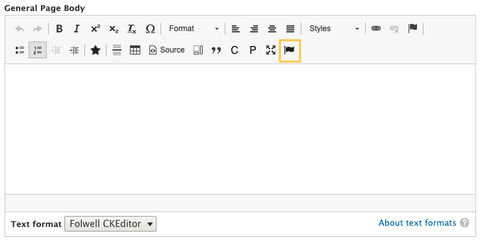
- The Font Awesome flag icon will now be available to you in the Folwell CKEditor. Note: the Font Awesome flag looks similar to the Anchor flag. The Font Awesome flag appears slightly wider. Mousing over the icons will display the name of the icon.
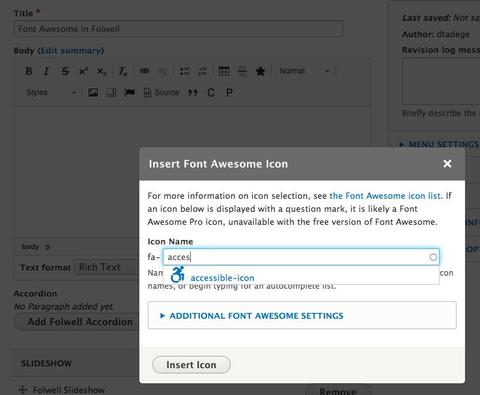
- To add a Font awesome icon, you can either find the icon names from the Font Awesome icons list, or you can simply begin typing and the autocomplete will show you the available icons with that name.
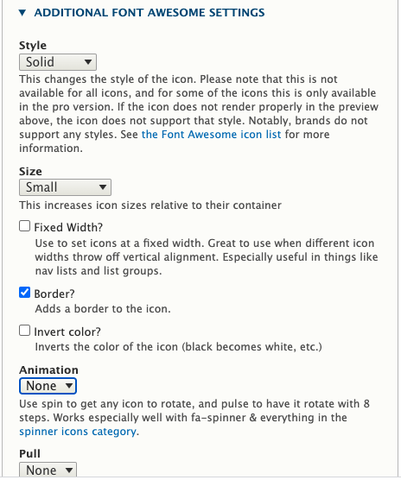
- After selecting an icon, you can then choose from the icon settings under the “Additional Font Awesome Settings” header. This allows you to choose icon weight, icon size, and many other options.
When using icons, it is important for accessibility and comprehension to include text that provides meaning. The icon cannot stand alone as a label.
Font Awesome icons are fully accessible and have been tested for usability.


